
Table of Contents
- Understanding Yeast Diaper Rash and Its Causes
- Identifying Symptoms of Yeast Diaper Rashes
- Top Treatments for Yeast Diaper Rash Relief
- Preventative Measures to Keep Your Baby Comfortable
- Choosing the Right Diapers to Minimize Yeast Risks
- Q&A
- In Retrospect
Understanding Yeast Diaper Rash and Its Causes
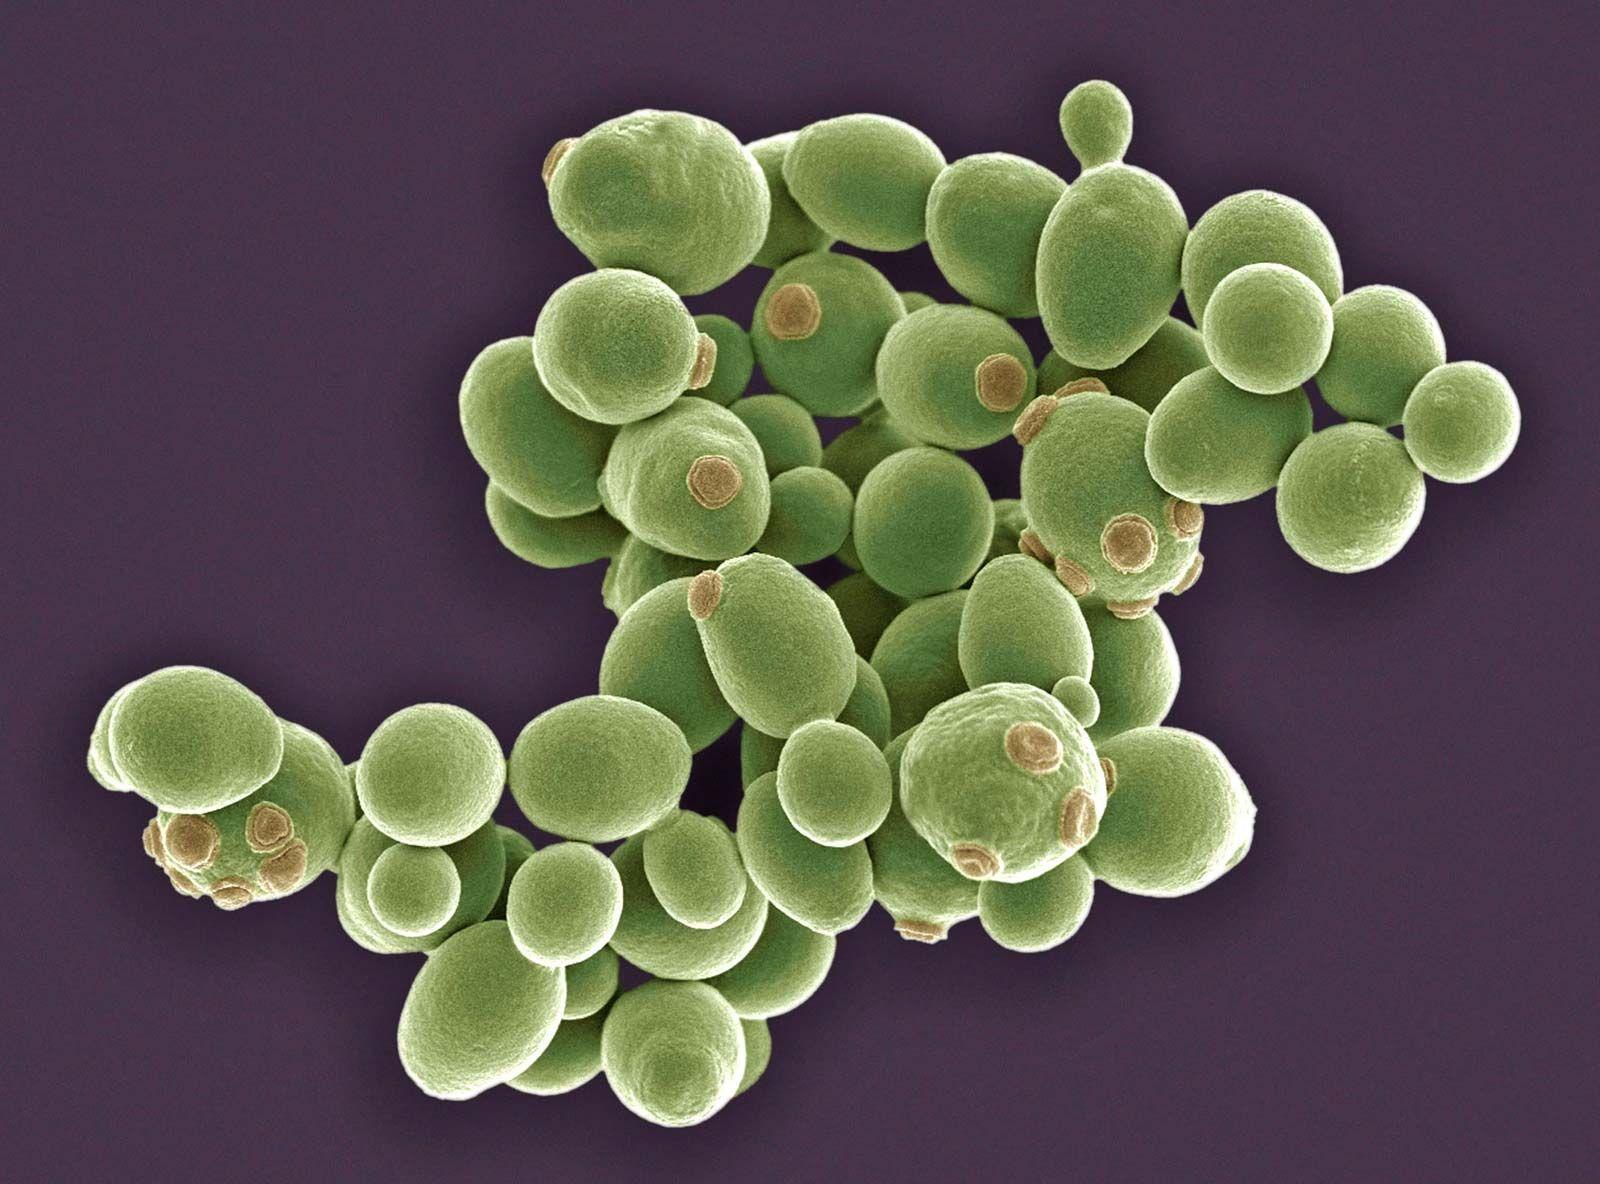
Yeast diaper rash is a common condition, particularly in infants and young children, often resulting from an overgrowth of Candida, a type of fungus. This condition can occur when the delicate skin in the diaper area becomes damp and warm, creating an ideal environment for yeast proliferation. As the yeast thrives, it can lead to irritation and inflammation, manifesting as red, swollen patches on the skin, which may also be accompanied by small, raised bumps. Typical symptoms include discomfort during diaper changes and persistent rash that doesn’t improve with standard diaper rash treatments.
There are several key factors that contribute to the development of yeast diaper rash. These include:
- Prolonged Skin Contact with Moisture: Wet or soiled diapers left on for too long can create an environment conducive to yeast growth.
- Antibiotic Use: Antibiotics can disrupt the natural balance of microorganisms on the skin. When good bacteria are diminished, yeast can flourish.
- Dietary Changes: Introduction of new foods, especially sugary items, can lead to changes in the body’s pH levels, promoting yeast overgrowth.
To effectively address and prevent yeast diaper rash, it’s crucial to maintain a dry diaper area and adhere to good hygiene practices. Frequent diaper changes, using breathable fabrics, and applying antifungal creams can help mitigate the issue. In cases where the rash persists, consulting a healthcare professional for further evaluation and a potential treatment plan is recommended. Early identification and intervention can lead to faster recovery, ensuring comfort for the little ones during their critical developmental stages.

Identifying Symptoms of Yeast Diaper Rashes
Recognizing the signs of a yeast diaper rash can be crucial for effective treatment and relief. Typically, this type of rash presents itself as bright red patches, sometimes with a defined border. You may notice small, pinpoint red dots surrounding the main area, which are often indicative of a secondary yeast infection. The rash may also have a shiny or moist appearance, giving it a distinct look compared to other diaper rashes.
In addition to physical appearance, babies may exhibit signs of discomfort or irritability when they have a yeast infection. Watch for behaviors such as:
- Excessive fussiness: A normally happy baby may become cranky or upset.
- Frequent crying during diaper changes: Increased sensitivity in the affected area can make diaper changes painful.
- Refusal to drink or eat: Discomfort may extend to feeding times.
To further differentiate yeast diaper rashes from other forms, it’s helpful to monitor the duration and response to treatments. Often, these rashes do not improve with standard diaper rash creams that focus on barrier protection. Instead, if the rash worsens after several days or shows no signs of improvement, it might indicate a persistent fungal infection. Below is a quick comparison of symptoms:
| Characteristic | Yeast Diaper Rash | Standard Diaper Rash |
|---|---|---|
| Appearance | Bright red with defined edges | Red and inflamed but less defined |
| Location | Often in skin folds | Widespread in diaper area |
| Response to Treatment | Persistent and may worsen without antifungal | Improves with barrier creams |
Top Treatments for Yeast Diaper Rash Relief
When it comes to alleviating yeast diaper rash, finding the right treatment can make all the difference. One of the most effective options is the use of antifungal creams. These topical treatments specifically target the yeast fungi, providing relief from discomfort and promoting healing. Look for creams containing active ingredients such as clotrimazole, miconazole, or nystatin, which are proven to combat yeast infections effectively. Applying a thin layer to the affected area after gentle cleansing can help to quickly restore your baby’s comfort.
In addition to antifungal creams, maintaining proper hygiene and moisture control is essential. Keeping the diaper area clean and dry helps prevent the yeast from thriving. Change diapers promptly after soiling, and consider using absorbent, breathable materials. Allowing your baby some diaper-free time each day can also promote air circulation and help dry out the affected area. Look into fragrance-free wipes or use a soft cloth with warm water for cleansing to avoid further irritation.
| Tips for Yeast Diaper Rash Care | Details |
|---|---|
| Antifungal Options | Clotrimazole, Miconazole, Nystatin |
| Hygiene Tips | Frequent diaper changes, gentle cleansing |
| Diaper-Free Time | Encourages air circulation, promotes healing |
Lastly, don’t overlook the importance of moisture barriers. After treating the rash, applying a layer of protective ointment such as zinc oxide can shield the skin and prevent further irritation from wetness. Be sure to choose products that are free from fragrances and dye to minimize any additional skin reactions. By combining antifungal treatments with good hygiene practices and protective measures, you can effectively manage and relieve yeast diaper rash, helping your little one feel more comfortable and happy.
Preventative Measures to Keep Your Baby Comfortable
Creating a comfortable environment for your baby is essential in preventing yeast diaper rash. One of the simplest yet most effective strategies is to maintain proper hygiene during diaper changes. Always ensure that your baby’s skin is clean and dry before putting on a new diaper. Consider using water-based wipes or a soft washcloth to gently clean the area. After cleaning, allowing the skin to air dry for a few moments can make a significant difference in keeping moisture at bay.
Choosing the right diapers plays an important role as well. Opt for breathable and absorbent materials that wick moisture away from your baby’s skin. Cloth diapers can be a good alternative, but they require frequent changing to prevent prolonged exposure to moisture. No matter what type of diaper you choose, ensuring it’s the right size is crucial; too tight a fit can lead to irritation and promote a warm, damp environment that yeast thrives in.
Applying a protective barrier cream can also help shield your baby’s delicate skin from irritation. Look for creams containing zinc oxide or natural ingredients such as coconut oil or shea butter. These compounds not only create a barrier against moisture but also have soothing properties for irritated skin. Here’s a quick comparison of some popular options:
| Product | Main Ingredient | Benefits |
|---|---|---|
| Diaper Rash Cream A | Zinc Oxide | Effective moisture barrier and fast relief |
| Diaper Rash Cream B | Coconut Oil | Natural antibacterial and soothing |
| Diaper Rash Cream C | Shea Butter | Hydrating and protective properties |
Choosing the Right Diapers to Minimize Yeast Risks
When it comes to safeguarding your little one from yeast infections, the choice of diaper plays a crucial role. Opting for breathable materials is fundamental. Natural fabrics such as cotton allow air circulation, thus reducing moisture accumulation, which is a prime breeding ground for yeast. Look for diapers labeled as hypoallergenic and free from irritating chemicals. Many parents find that these options not only keep the skin healthier but also lower the chance of rashes developing.
Another critical factor is the fit of the diaper. A snug but comfortable fit minimizes leakage while allowing for adequate airflow. Diapers that are too tight can cause friction and trap moisture, creating an ideal environment for yeast growth. Consider the following points when selecting a diaper:
- Ensure the legs are snug without being restrictive.
- Check for adjustable waistbands for a better individual fit.
- Choose diapers with moisture-wicking properties to keep the skin dry.
Additionally, pay attention to the frequency of changes. Regularly changing the diaper is vital whether you choose disposable or cloth options. Wetness and prolonged contact with irritants can trigger yeast overgrowth. Establish a routine to change diapers every 2-3 hours or as soon as you notice they are soiled. To further help, you might consider incorporating a cleaning routine using warm water and gentle, alcohol-free wipes. Doing so can prevent yeast infections and ensure your baby’s comfort.


0 Comments